

A Step-By-Step Beginners Guide: How to Do Fluid Resin Art
Fluid resin art involves using epoxy resin mixed with pigments to create beautiful, flowing patterns on various surfaces such as canvas, wood, or even furniture. The resin's self-leveling properties allow it to spread and blend effortlessly, resulting in captivating abstract designs.
Fluid resin art has become increasingly popular among artists of all levels, offering a unique and mesmerising way to create stunning works of art. If you're a beginner looking to dive into the world of resin art, consider joining online resin art classes or workshops to start your journey. This blog will walk you through the step-by-step process of creating your fluid resin art. So, let's get started and unlock your artistic potential with fluid resin art!
Essential Materials and Tools for Fluid Resin Art
Fluid resin art requires specific materials and tools to create stunning artwork. Here is a list of essential materials and equipment you'll need to get started:
- Resin: Choose a high-quality epoxy resin specifically designed for art projects. The resin acts as the foundation for your artwork, providing a glossy and durable finish.
- Pigments: Acrylic or alcohol-based pigments are used to add vibrant colours to your resin. Opt for pigments that are compatible with epoxy resin for the best results.
- Additives: Some artists use additives like silicone oil or alcohol to create unique effects such as cells or lacing in their artwork. Experiment with different additives to achieve desired effects.
- Canvas or Wood Panel: Select a sturdy canvas or wood panel as your base. Ensure it is properly primed and free from any dust or fabric.
Tools for Fluid Resin Art
- Measuring Cups: Accurate measuring is crucial in resin art. Use graduated measuring cups to measure equal parts of resin and hardener according to the manufacturer's instructions.
- Stir Sticks: Use disposable wooden or plastic stir sticks to thoroughly mix the resin and hardener. Stir gently to avoid introducing air bubbles into the mixture.
- Torch or Heat Gun: A torch or heat gun is used to remove any air bubbles that may have formed during the mixing process. Pass the flame over the surface of the resin in a sweeping motion to eliminate bubbles.
- Palette Knife: A palette knife can be used to create interesting textures or manipulate the flow of the resin on your canvas.
- Silicone Moulds: Silicone moulds are useful for creating unique shapes and forms within your artwork. They come in various sizes and designs, allowing you to explore different possibilities.
Step-by-Step Guide to Creating Your First Fluid Resin Artwork
Creating your first fluid resin artwork can be an exciting and rewarding experience. From preparing the canvas to applying the final touches, here is a detailed walkthrough of the entire artistic process:
Prepare Your Workspace
Start by setting up your workspace in a well-ventilated area with proper protective measures in place. Ensure that you have a clean and level surface to work on.
Gather Your Materials
Collect all the materials you'll need for your project, like:
- Resin
- Pigments
- A torch or heat gun
- Measuring cups
Mix the Resin
Carefully measure and mix the resin according to the manufacturer's instructions. Use separate measuring cups for the resin and hardener, and stir them together thoroughly for the specified amount of time.
Add Pigments
Once your resin is mixed, it's time to add pigments or dyes to create stunning colours. Start with a small amount of pigment and mix it into the resin until you achieve your desired colour intensity.
Prepare the Canvas
Place your canvas on a raised surface or use plastic sheets to catch any drips. You can also apply a coat of clear resin as a base layer if desired.
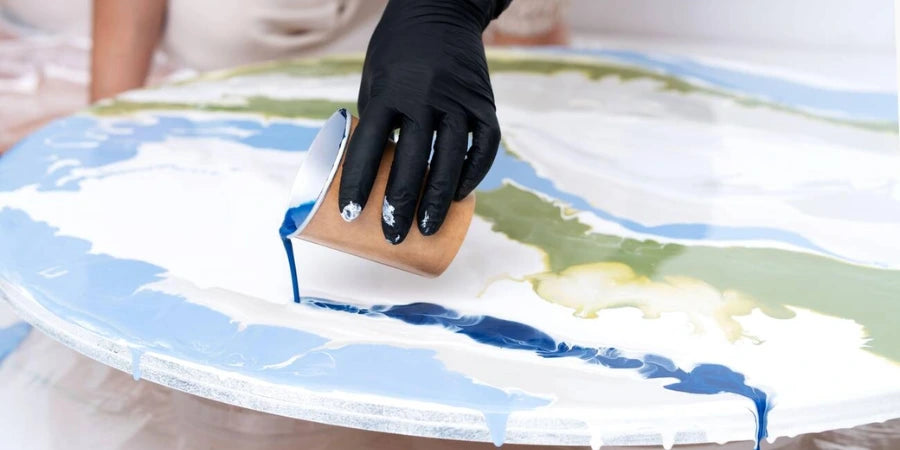
Apply the Resin
Apply the resin to the canvas using techniques such as pouring, dripping, or using a palette knife. Experiment with different methods to create interesting patterns and effects. If you want to add more depth and dimension to your artwork, try techniques like the dirty pour or swipe method. These involve layering different colours of resin and manipulating them with tools to create unique designs.
Eliminate Bubbles
After applying the resin, you may notice bubbles forming on the surface. To remove them, use a torch or heat gun held at a safe distance above the artwork. The heat will cause the bubbles to rise and pop.
Let It Cure
Once you're satisfied with your artwork, let it cure in a dust-free environment according to the resin manufacturer's instructions. This can take anywhere from 24 hours to several days, depending on the brand of resin used.
Exploring Various Techniques in Fluid Resin Art
Fluid resin art offers a wide range of techniques for artists to explore and unleash their creativity. Here is a broad overview of some popular techniques used in this medium:
Dirty Pour
This technique involves layering different colours of resin in a cup or container and then pouring them onto the canvas all at once. As the colours mix and interact with each other, fascinating patterns and unique effects emerge. You can experiment with different pouring heights, pour speeds, and colour combinations to create stunning abstract designs.
Swipe Method
In this technique, you can pour multiple colours of resin onto the canvas in a line or puddle formation. Then, using a tool like a palette knife or spatula, gently swipe across the surface to blend the colours and create beautiful flowing patterns. By varying the angle and pressure applied during the swiping motion, you can achieve different effects and add depth to your artwork.
Alcohol Ink Technique
This technique can also be adapted for fluid resin art. You can apply drops of alcohol ink onto the surface of the resin and then use a heat tool or straw to manipulate the ink, creating mesmerising organic shapes and textures. The alcohol reacts with the resin, causing it to move and blend in captivating ways.
Dutch Pour
Similar to the dirty pour technique, the Dutch pour involves pouring multiple colours of resin onto the canvas simultaneously. However, instead of pouring from one central point, you can pour from various locations around the canvas. This creates dynamic movement and distributes the colours more evenly across the surface.
Conclusion
Embrace the fluidity of resin art and let your creativity flow. Fluid resin art allows for unpredictable and unique results, making each piece one-of-a-kind. The beauty of this art form lies in its ability to capture the organic movement of the resin as it interacts with pigments and other elements.
If you're feeling inspired to learn more about fluid resin art, consider joining Arts Shala. With their online classes and workshops, you can further enhance your skills and explore advanced techniques. Contact Us on Arts Shala today and unlock the endless possibilities of resin art!


