

Creating Resin Sculptures: Step-by-Step Guide to Molding and Casting Human Figures
Creating resin sculptures is a delicate interplay between artistry and technique. You begin by conceptualising your design and meticulously planning each detail. Once you have a clear vision, you mould the sculpture using a combination of techniques such as carving, moulding, and casting.
One of the most fascinating aspects of creating resin sculptures is using resin as the primary medium. Resin is a versatile, translucent material, allowing you to play with light and create ethereal effects. This unique resin quality adds a mesmerising dimension to each piece, making it unique.
Whether you are an experienced sculptor or a beginner, this blog will provide valuable insights into moulding and casting human figures using resin. From choosing suitable materials to mastering the techniques, if you wish to learn more about this technique, enrol yourself in a resin art course.
Why Choose Resin for Sculptures?
The sheer beauty of resin sculptures sets them apart in the art world. Resin offers several advantages over traditional sculpting materials like clay or stone.
Advantages of Using Resin for Sculptures:
- Durability: Unlike other materials, resin exhibits exceptional strength and resilience, allowing it to withstand the harshest environmental conditions. Extreme temperatures and humidity, which often pose a threat to sculptures made from other materials, are no match for resin. This remarkable durability ensures that your epoxy resin sculpture resin sculpture remains intact and retains its beauty for years.
- Versatility: Thanks to resin's adaptability, you can explore various techniques and styles. Resin can mould itself accordingly, whether your artistic vision leans towards a realistic representation or an abstract creation. As a result, your sculpture will exhibit a visually enticing and lifelike appearance. From delicate sculptures to abstract masterpieces, resin offers endless possibilities.
- Lightweight: Being lightweight, resin sculptures are incredibly easy to handle, transport, and display. Unlike heavy stone or metal sculptures, the use of resin provides you with the freedom to create large-scale pieces without the structural limitations imposed by heavier materials. The lightweight nature of resin sculptures also opens up avenues for creative experimentation.
- Transparency: One of the critical advantages of using resin is its ability to offer transparency. Transparent resin allows light to pass through, resulting in intriguing visual effects and captivating reflections that enhance the overall aesthetic appeal of the sculpture.
- Colour Options: Resin brings a plethora of colour options to the table. You can add pigments and dyes to resin, enabling you to infuse your sculptures with vibrant and vivid colours. This opens up a whole new world of possibilities, allowing you to create stunning, dynamic pieces that indeed come to life.
Casting: Bringing Your Sculpture to Life
Now that you have a well-cured mould, it's time to cast your resin sculpture. Follow these steps to achieve a stunning final product:
Step 1: Prepare the Resin
Mix the catalyst and resin according to the manufacturer's instructions. Stir thoroughly to ensure a homogeneous mixture.
Step 2: Pour the Resin into the Mould
Slowly pour the resin into the mould, ensuring that every detail is adequately filled. Take care not to introduce air bubbles, as they can influence the quality of your final piece.
Step 3: Remove Air Bubbles
To remove air bubbles, gently tap the mould or use a vibrating tool to encourage them to rise to the surface. Alternatively, you can use a pressure pot to eliminate bubbles effectively.
Step 4: Allow the Resin to Cure
Resin typically takes a few hours to cure, but the exact curing time may vary depending on the resin type. Follow the manufacturer's instructions for the recommended curing time.
Step 5: De-mould the Sculpture
Once the resin has fully cured, carefully de-mould the sculpture by gently flexing the mould. Take your time to ensure the sculpture is safely released from the mould.
Materials and Tools Required for Creating Resin Sculptures
To create resin sculptures, you'll need the following materials and tools:
- Resin: Choose a high-quality, artist-grade resin suitable for sculpting.
- Mould-making materials: Silicone rubber or polyurethane rubber for creating moulds.
- Sculpting tools: Basic sculpting tools include clay modelling, brushes, and spatulas.
- Release agent: A substance that prevents the resin from sticking to the mould.
- Safety equipment: Gloves, goggles, and a well-ventilated workspace to ensure your safety throughout the process.
- Sandpaper and Files: Sandpaper and files are used to smooth any rough edges or imperfections on your sculpture.
- Epoxy Resin Coating: To give your sculpture a glossy and professional appearance.
- Pigments and Additives: These can include resin dyes, mica powders, glitter, dried flowers, or other decorative elements.
Choosing the suitable resin for your sculpture is essential to achieve durability, clarity, and overall quality. Here are some key points to keep in mind:
- Resin Type: Polyester resin is affordable and cures quickly, making it suitable for larger sculptures. Epoxy resin, on the other hand, offers high strength and superior clarity.
- Transparency: If you want a crystal-clear finish, opt for epoxy resin, which looks glass-like.
- UV Resistance: For outdoor or sun-exposed sculptures, choose a resin with UV resistance to prevent yellowing or fading over time.
- Viscosity: Select a lower-density resin for intricate designs, ensuring it reaches your mould's nooks and crannies.
- Curing Time: Consider the complexity of your sculpture and your preferred pace of work. Quick-curing resins allow you to advance faster, while longer curing times provide more time for intricate details.
The Initial Step: Conceptualising the Resin Sculpture
Conceptualising the epoxy resin sculpture involves the initial step in creating any sculpture piece.
- The process starts with developing the idea and creating a mental picture of the intended creation. To refine the concept further, you can make drawings and sketches to visualise the intended design.
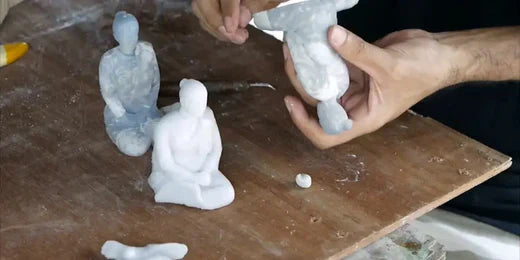
- Following the sketches, you create a miniature version of the sculpture, known as a Marquette. It serves as a reference for the sculptor when translating the design into a larger, life-size resin sculpture.
- The details and proportions of the miniature version are crucial in accurately mimicking them. Through this conceptualisation process, you can bring your envisioned sculpture to life using resin as the chosen material.
The Moulding Process: Capturing the Details
The moulding process is a crucial step in creating resin sculptures as it determines the quality and accuracy of the final piece. Here's a step-by-step guide to help you mould your human figure:
Step 1: Prepare the Sculpture
Before the mould-making process can begin, you must prepare the original sculpture. This involves cleaning the sculpture to remove any dirt, dust, or imperfections that could affect the final mould. Additionally, you may need to make necessary repairs or adjustments to the sculpture to ensure the best possible outcome.
Step 2: Build the Mould Box
Construct a mould box using wooden or acrylic boards to contain the moulding material. Before cutting your materials, decide on the dimensions of your mould box. Ensure that the box is slightly larger than the sculpture to allow room for the mould-making material. Assemble the box by screwing or glueing the cut pieces together. Make sure the corners are secure and free of any gaps.
Step 3: Apply a Release Agent
To apply a release agent, clean the original artwork thoroughly to remove any dust or debris. Next, apply a thin and even release agent layer on all artwork surfaces. This can be done using a soft brush or a spray-on release agent. Ensure that the release agent covers every nook and cranny of the artwork, as this will ensure that the mould captures all the details accurately.
Step 4: Mix and Pour the Mould-making Material
With the mould-making material ready and the object prepared, carefully immerse the object into the mould-making material. Please ensure the object is centred within the material, allowing it to be fully encapsulated. Gently press down on the object to ensure it is firmly embedded in the material without air pockets.
Step 5: Allow the Mould to Cure
Once the object is positioned correctly in the mould-making material, it's time to let the mould cure. Curing times may vary depending on the product, so refer to the manufacturer's instructions for guidance. Typically, moulds must cure for several hours or overnight to ensure they are fully hardened and ready for the next step.
Conclusion
Creating resin sculptures of human figures requires skill, patience, and attention to detail. Following this guide, you can embark on a rewarding artistic journey and produce stunning pieces showcasing your creativity. Remember to experiment with techniques, colours, and finishes to bring your sculptures to life. With dedication and practice, you'll soon discover resin's limitless possibilities in art. To learn more about resin art, visit Arts Shala's website and become a part of an imaginative art community. Contact Us for more information.
Frequently Asked Questions
How to Make a Resin Figure?
To create a resin art sculpture, start by conceptualising your design and preparing a miniature model. Use silicone or polyurethane rubber to create a mould of your sculpture. Mix epoxy resin with a catalyst, ensuring a homogeneous mixture. Pour the resin into the mould, removing air bubbles by tapping or using a vibrating tool. Allow the resin to cure as per the manufacturer’s instructions. Once cured, de-mould the sculpture and refine it using sandpaper or files. Finish with an epoxy resin coating for a glossy look, perfect for beginners exploring resin sculpture techniques.
What Do I Need to Make Resin Sculptures?
For beginners who are constructing resin sculptures, gather essential materials: high-quality epoxy resin, silicone or polyurethane rubber for mould-making, sculpting tools, and a release agent to prevent sticking. Safety equipment like gloves, goggles, and a ventilated workspace is crucial. You’ll also need sandpaper, files, and pigments or additives for colour and texture. Epoxy resin coating adds a professional finish. These supplies ensure durability, clarity, and versatility, making them ideal for creating detailed and vibrant resin art sculptures, whether you’re a beginner or an experienced artist.
What Supplies Do I Need for Resin Casting?
For resin casting, you’ll need epoxy resin, a catalyst, and mould-making materials like silicone rubber. A release agent ensures easy de-moulding. Tools include mixing cups, stir sticks, and a vibrating tool to remove air bubbles. Safety gear like gloves and goggles is essential. Sandpaper and files help refine the sculpture, while pigments or additives add colour and texture. An epoxy resin coating provides a glossy finish. These supplies are vital for creating durable, detailed, and visually stunning resin art sculptures, making them perfect for beginners and professionals alike.
What Is the Best Resin for Casting Sculptures?
The best resin for casting sculptures depends on your project. Epoxy resin is ideal for its high strength, clarity, and glass-like finish, making it perfect for detailed resin art sculptures. Polyester resin is affordable and cures quickly, making it suitable for larger pieces. For outdoor sculptures, choose UV-resistant resin to prevent yellowing. Low-viscosity resin works well for intricate designs, ensuring it fills every detail. Beginners should opt for epoxy resin for its ease of use and professional results, making it a top choice for resin sculpture for beginners.
How Do People Make Resin Casts of Complicated Sculptures?
Creating resin casts of complicated sculptures involves meticulous mould-making. Start by preparing the original sculpture and applying a release agent. Build a mould box slightly larger than the sculpture. Mix and pour silicone or polyurethane rubber into the box, ensuring all details are captured. Allow the mould to cure fully. For casting, use low-viscosity epoxy resin to fill intricate details. Remove air bubbles using a vibrating tool or pressure pot. Once cured, de-mould the sculpture carefully. This process ensures accurate replication, making it ideal for detailed resin art sculptures, even for beginners.


