How Can I Start Building a Resin Table in My Garage?
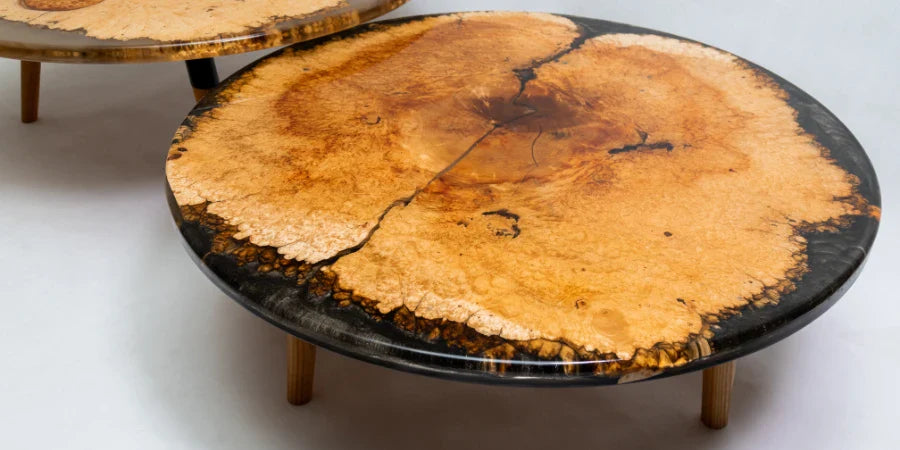
Are you looking to add a touch of elegance and sophistication to your living space? Look no further than a resin table. With its unique blend of style, durability, and versatility, it is a perfect choice for any home or office.
Building it can be a rewarding and creative project that allows you to showcase your craftsmanship while also adding a touch of modern elegance to your space. In this blog, we will guide you through the process of starting and completing a resin table project in your garage. To learn it in more detail, join a resin art course.
Materials & Tools Needed for Building a Resin Table
Before you can begin building a resin table, it's important to gather all the necessary materials and tools. Here's a helpful checklist to get you started:
Steps Required to Build a Resin Table
With the right tools, materials, and a little patience, you can create a stunning resin table that will be the envy of your friends and family. So, gather your supplies, roll up your sleeves and follow the following steps:
Step 1: Designing Your Resin Table
Decide on the size, shape, and colour scheme you want for your table. Consider factors such as the available space in your home and the existing decor. Sketch out your design on paper or use design software to visualise your ideas. This step allows you to create a blueprint to reference as you progress through the building process.
Step 2: Preparing the Wood
Preparing the wood slab is crucial to ensure a successful resin table project. Follow these steps:
- Sand the Wood: Start by sanding the wood slab with coarse sandpaper to remove any roughness or imperfections. Gradually work your way up to finer grits for a smooth finish.
- Seal the Wood: Apply a wood sealer or pre-stain conditioner to the slab to prevent the resin from seeping into the wood pores.
- Create a Dam: Use painter's tape to create a dam around the edges of the wood slab. This will contain the resin and prevent it from overflowing.
- Level the Slab: Place the wood slab on a flat and level surface. Use shims or adjustable feet to ensure stability and prevent any wobbling.
Step 3: Creating a Mould
To contain the epoxy resin and prevent leaks, you'll need to create a mould for your tabletop. This can be done using plastic tape or a barrier specifically designed for epoxy resin projects. Carefully line the edges of the wood with the tape or barrier, ensuring there are no gaps or openings where the resin could escape.
Step 4: Mixing and Pouring the Resin
Now that your wood slab is ready, it's time to mix and pour the resin. Follow these guidelines:
- Measure and Mix the Resin: Carefully follow the manufacturer's instructions to measure and mix the epoxy resin. Make sure to wear protective gear and work in a well-ventilated area.
- Add Pigments and Dyes: If you want to add colour to your resin, now is the time to do it. Add pigments or dyes in small amounts and mix thoroughly until you achieve your desired colour.
- Pour the Resin: Slowly pour the mixed resin onto the wood slab, starting from the centre and working your way outwards. Use a stir stick to spread the resin evenly across the surface.
- Remove Air Bubbles: Use a heat gun or torch to remove any air bubbles that may have formed on the surface of the resin. Move the heat source in a sweeping motion to avoid overheating the resin.
Step 5: Curing and Finishing
After pouring the resin, allow it to cure according to the manufacturer's instructions. This can take anywhere from 24 to 72 hours, depending on the type of epoxy resin used. Once the resin is fully cured, follow these final steps:
- Remove the Dam: Carefully remove the painter's tape dam from the edges of the wood slab.
- Sand and Polish: Use fine-grit sandpaper to sand the resin surface until it is smooth and even. Apply a polishing compound for a glossy finish.
- Apply a Protective Finish: To protect the resin and enhance its longevity, apply a clear protective finish, such as a polyurethane sealer.
Conclusion
Building a resin table in your garage can be an enjoyable and fulfilling DIY project. By carefully planning and executing each step, you can create a stunning piece of furniture that is sure to impress. Remember to take your time, follow safety precautions, and enjoy the process of bringing your vision to life.
So why wait? Start gathering your materials and dive into the world of resin table building today! If you wish to learn more about creating a resin table or other popular resin art techniques, make sure to visit Arts Shala’s website. Contact Us for more information.


