

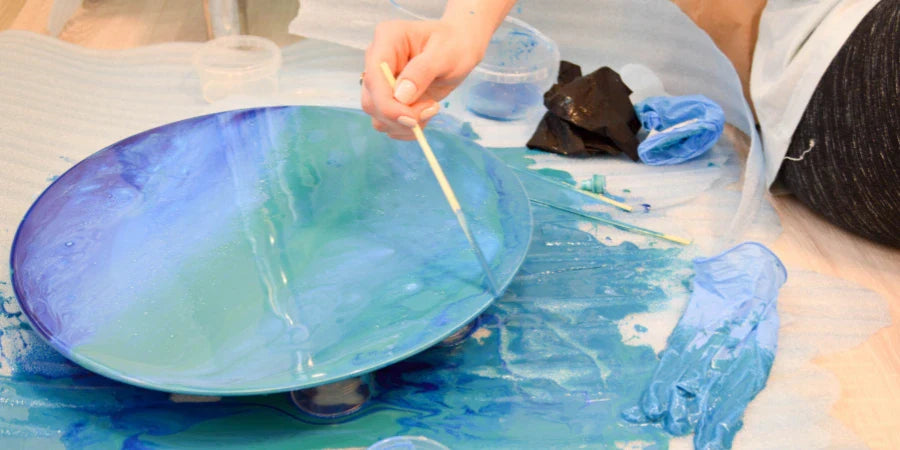
How to Get My Epoxy Resin Piece to Be Flat?
Epoxy resin is an adaptable material commonly used in various craft projects, including creating stunning art pieces. However, one challenge many artists and creators face is achieving a flat surface in their pieces. A smooth and level shell enhances the overall look and feel of the artwork, giving it a professional and polished appearance.
Additionally, it ensures that your resin piece is functional, allowing it to be safely used as a tabletop or any other application requiring a flat surface. This blog will explore some effective techniques and precautions to help you attain the desired flatness in your creations. Enrol in a resin art course to learn how to do this in detail.
Preparation Is Key to Creating a Flat Surface
Achieving a balanced epoxy resin piece starts with proper preparation. Here are some steps to follow before you begin your resin pour:
- Clean and Level Workspace: Ensure your work area is neat and balanced. Any debris or unevenness can cause irregularities in your art piece.
- Protective Barriers: Use masking tape or a release agent to create borders around the edges of your project. This prevents the resin from dripping over and creating irregular edges.
- Temperature and Humidity Control: Avoid pouring epoxy resin in extreme temperatures or high humidity. This can cause it to cure unevenly, resulting in a wavy or unlevel surface.
- Proper Mixing: Follow the manufacturer's instructions when blending your epoxy resin. Accurate measurements and thorough mixing ensure that the resin cures uniformly.
Techniques to Get Epoxy Resin Pieces to Be Flat
Even with careful preparation, sometimes epoxy resin can still cure with uneven surfaces. Thankfully, there are several techniques you can use to level out your resin piece after it has cured:
Sanding
It helps to eliminate imperfections such as bumps, bubbles, and ridges that may have formed during the pouring and curing stages. Sanding also creates a smooth and even surface, enhancing the appearance of your artwork.
- Start with a Coarse Grit: Begin by rubbing the surface of your piece using coarse grit sandpaper. This will help remove major imperfections and high spots. Use a sponge or sanding block to achieve consistent pressure and proper sanding. Work in a circular motion and keep the pressure even throughout.
- Gradually Move to Finer Grits: As the surface becomes smoother and more level, progress to sandpapers with finer grits. This will help refine the exterior further and eliminate any scratches the sandpaper leaves. Remember to use light and even pressure and maintain a consistent sanding motion.
- Check for Imperfections: After sanding with the finer grits, inspect for any remaining imperfections. If you notice any low spots or uneven areas, continue rubbing carefully until the surface is satisfactory.
- Clean and Polish: Once you are satisfied with the flatness of your epoxy resin piece, clean off any sanding residue using a slightly damp cloth. This will also help you to evaluate the final result. You can polish the surface with a fine polishing compound or resin polish to enhance its shine if desired.
Heat Gun
The heat from the gun softens the resin, allowing it to self-level and eliminate imperfections. Here's a step-by-step guide on how to use it to achieve a flat surface for your epoxy resin art:
- Prepare Your Workspace: Start by ensuring that your workspace is clean, well-ventilated, and free from any dust or debris that could mar the finish of your artwork.
- Secure Your Resin Piece: Place your epoxy resin piece on a level surface and use masking tape or adhesive putty to secure it in place. This will prevent the piece from moving or shifting during the levelling process.
- Preheat Your Heat Gun: Before applying heat to your resin piece, preheat your heat gun in low or medium-heat settings. It's important to avoid using high heat, as this can cause the resin to bubble or scorch.
- Apply Heat: Hold the heat gun about 6-8 inches away from the resin piece and move it in a circular motion. It will soften the resin, allowing it to flow and level out independently. Continue applying until you achieve a smooth, flat surface.
- Remove Any Air Bubbles: While applying heat, you may notice air bubbles rising to the surface of the resin. To remove them, gently blow on the resin or use a heat-resistant tool, such as a toothpick or needle, to pop the bubbles.
- Allow the Resin to Cure: After levelling the resin with a heat gun, it's essential to let it cure undisturbed for the recommended curing time. This will ensure that the resin sets properly and maintains its flat surface.
Pour Another Layer
Applying another resin layer on top of your epoxy resin piece lets you level out any unevenness and achieve a flat surface. This technique effectively fills in small imperfections and provides a smooth and even finish to your artwork. Here's how you can do it:
- Prepare the Surface: Before pouring another layer of resin, ensure that the surface of your piece is clean and free from dust and debris. Use a soft cloth or brush to remove any dirt or particles.
- Mix the Resin: Follow the instructions provided by the manufacturer to mix a fresh batch of epoxy resin. Ensure that you mix it thoroughly to avoid any air bubbles.
- Pour the Resin: Slowly run the fresh resin onto the surface of your epoxy resin piece, starting from the lowest point. Use a scraper or spreader to distribute the resin across the surface evenly.
- Spread the Resin: Gently extend it using a plastic spreader or a spatula, covering the entire surface. Pay special attention to uneven areas and evenly distribute the resin to level the surface.
- Remove Air Bubbles: To ensure a smooth finish, use a heat gun or a torch to remove any air bubbles that may have formed during the pouring process. Be cautious not to overheat the resin, as it can cause damage.
- Allow Curing: Let the resin cure according to the manufacturer's instructions. This may take several hours or even days, so be patient and allow enough time for the resin to harden fully.
Fill with Clear Coat
A clear coat is an additional layer of resin that you can apply over your cured resin piece. It acts as a self-levelling agent, helping smooth out imperfections and create a flat finish. To ensure the best results when using the clear coat as a levelling technique, here are some additional tips to keep in mind:
- Work in a Dust-Free Environment: Dust particles can easily disrupt the self-levelling process of the clear coat. Choose a clean and controlled workspace to minimise dust settling on your resin piece.
- Use a Slow-Curing Epoxy Resin: It gives the clear coat more time to level itself and eliminate imperfections. Look for resins with longer curing times for better results.
- Apply Multiple Thin Layers: Instead of pouring a thick layer of clear coat all at once, it is better to apply multiple thin layers. This allows each layer to self-level properly without overwhelming the surface.
- Sand in Between Coats: If you notice any minor imperfections or uneven spots after each clear coat, lightly sand the surface before applying the next layer. This will help create an even smoother finish.
Conclusion
Achieving a flat epoxy resin piece requires proper preparation, effective levelling techniques, and preventive measures for future uneven surfaces. You can create a smoother surface for your resin project by dedicating time to adequately preparing your work area. Additionally, employing levelling techniques can greatly improve the flatness of your piece. Lastly, to prevent future uneven surfaces, it is crucial to carefully measure and mix your resin components, follow manufacturer instructions, and use a self-levelling epoxy resin if necessary.
For a more in-depth understanding of these topics and to explore further tips and tricks, we encourage you to visit Arts Shala's website. There, you will find comprehensive resources and guides to help you master this art. Please do not hesitate to Contact Us if you have any specific inquiries or require additional information.


