

How to Make Resin Coasters Step by Step?
Resin coasters are not only functional but also serve as a unique and personalised piece of art for your home. If you're looking for a fun and creative resin art project, making resin coasters is the perfect choice. If you're eager to learn more about resin coasters, consider joining a resin art workshop where you can further enhance your skills and explore more advanced techniques. In this blog, we will guide you through the process of creating your resin coasters. So let's get started and learn how to create stunning resin coasters step by step!
Required Essential Materials
When it comes to creating resin coasters, having the right materials is essential. Here's a list of the key items you'll need for this craft resin coasters tutorial:
- Craft Resin: To create beautiful and durable coasters, you'll need a high-quality craft resin. The most popular option is Arts Shala's craft resin. This resin is designed specifically for crafting projects and provides excellent clarity and durability.
- Silicone Coaster Moulds: Silicone moulds are ideal for making resin coasters as they are flexible, easy to use, and allow for easy removal of the finished coasters. You can find a variety of coaster mould designs online or at your local craft store.
- Items to Embed in the Coasters: Get creative with your coasters by embedding various items in the resin. This could include dried flowers, glitter, seashells, or any other small decorative objects that you'd like to showcase in your coasters.
- Disposable Measuring Cups: Accurate measurements are crucial when working with resin. Disposable measuring cups make it easy to measure and mix the resin components accurately without worrying about clean-up.
- Wooden Stir Sticks: Use wooden stir sticks to mix the resin components thoroughly. They are disposable and won't leave any residue or affect the curing process.
- Latex Gloves: Protect your hands from coming into direct contact with the resin by wearing latex gloves throughout the entire process.
- Protective Drop Cloth: Resin can be messy, so it's important to work on a covered surface to protect your workspace from spills and drips.
- Heat Gun: Surface bubbles may form when pouring the resin into the moulds. A heat gun can be used to remove these bubbles by carefully running the flame over the surface of the resin.
- Dust Covers: To prevent dust particles from settling on your coasters while they are curing, cover them with dust covers. This will ensure a smooth and clean finish.
- Clear Bumpers for Coaster Bottoms: Add clear bumpers to the bottom of your coasters to provide stability and prevent surface damage when placing them on various surfaces.
Important Safety Precautions
It is important to take certain safety precautions to ensure a smooth and hassle-free crafting experience. These precautions are essential for protecting yourself and creating a safe working environment. Here are some important safety measures to keep in mind:
- Well-Ventilated Area: Resin emits fumes during the curing process, which can be harmful if inhaled in large quantities. It is crucial to work in a well-ventilated area, such as a workshop with open windows or use an exhaust fan to remove any fumes from the air. This will help minimise the risk of respiratory issues and ensure good air circulation.
- Wearing Protective Gloves: Resin can be sticky and messy, so wearing protective gloves is essential. Latex gloves are recommended as they provide a barrier between your skin and the resin, preventing direct contact and potential skin irritation or allergic reactions.
- Working on a Covered Surface: Resin is known for its ability to adhere to surfaces, making it difficult to remove once it dries. To protect your work area from accidental spills or drips, lay down a protective drop cloth or plastic sheeting. This will not only keep your workspace clean but also make clean-up easier.
Mixing and Preparing the Resin
Before you begin working with resin, it's important to familiarise yourself with the manufacturer's instructions for mixing and preparing the resin. Different resins may have specific ratios or curing times, so be sure to follow these guidelines carefully. Here's a step-by-step guide on mixing the resin:
- Start by setting up your workspace in a well-ventilated area and wearing protective gloves.
- Measure out an equal amount of resin and hardener according to the size of the coaster moulds you plan to fill.
- Carefully pour the measured amounts into a disposable mixing cup.
- Use a wooden stir stick to blend the resin and hardener for about 6 minutes, making sure to scrape the sides and bottom of the cup to integrate the two components fully.
- Once the mixture is free of streaks and has a consistent transparency, it is ready for the next stage of mixing.
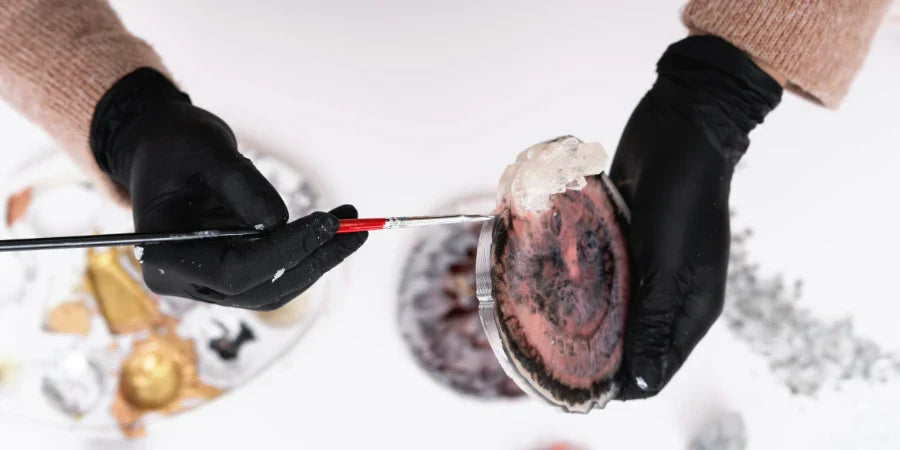
Embedding Items in the Resin
When it comes to embedding items in resin-filled moulds, creativity is endless. Before pouring the resin, arrange and prepare the items you wish to embed. Whether it's dried flowers, stems, or any other small trinkets, ensure they are clean and dry. Here's a simple guide on how to effectively bring your vision to life:
- Pouring the Resin: Once your items are ready, place them into the mould and carefully pour a layer of mixed resin into the mould.
- Adding the Embedded Items: Gently place your chosen items into the resin-filled mould. You can create beautiful designs by arranging them strategically or simply letting them float naturally.
- Removing Surface Bubbles: After embedding the items, it's crucial to eliminate any surface bubbles that may have formed during the pouring process. Using a butane lighter or heat gun, carefully move the flame across the surface to pop and remove these bubbles.
- Allowing the Resin to Set: Let the resin and embedded items set for a few minutes before proceeding with additional layers or allowing it to cure completely.
Curing and Demoulding the Coasters
Once you have embedded your desired items in the resin-filled moulds and removed any surface bubbles, it's time to let the resin cure and harden properly. The curing process is crucial for ensuring that your coasters become sturdy and long-lasting. Here's how you can cure and de-mould your resin coasters:
Curing Time for Resin Coasters
The curing time for resin coasters can vary depending on the brand of resin you are using. Following the manufacturer's instructions for the specific resin product you have chosen is important. In general, the first layer of resin should be allowed to cure for at least 4 hours before proceeding to the next step.
Top Coat Curing Time
After the first layer has cured, you will need to mix more resin for the top coat of your coasters. Pour the mixed resin into the moulds, covering all the embedded items completely. To remove any bubbles that may form during this process, use a heat gun to pass over the surface of the resin gently.
Cover and Cure
Once you have poured the top coat, cover your moulds with dust covers or any other suitable covers to protect them from dust particles settling on the surface. Allow the coasters to cure undisturbed for at least 24 hours or as per the recommended curing time mentioned by the manufacturer.
Removing Silicone Moulds
After 24 hours of curing, gently peel away the silicone moulds from the cured resin coasters. Start by flexing one side of each mould away from the coaster and gradually work your way around until it is completely released. Be careful not to apply too much force, as it could damage your coasters.
Adding Finishing Touches
Now that your resin coasters have cured and been de-moulded, it's time to add some finishing touches to ensure they are both stable and protected. Here's how you can add protective bumpers to the bottom of the coasters:
Choose the Right Bumpers
Look for clear bumpers that are specifically designed for coaster bottoms. These bumpers are usually made of rubber or silicone and provide a non-slip grip while also protecting your furniture from scratches.
Position the Bumpers
Place the coasters upside down on a flat surface. Take one bumper and peel off the backing to reveal the adhesive side. Carefully position the bumpers on the corners of the coaster bottom, ensuring it is centred and aligned properly. Press down firmly to secure it in place.
Test for Stability
Once all the bumpers are attached, flip the coasters over and test their stability on a flat surface. They should sit level without wobbling or sliding. By adding these protective bumpers, you not only enhance the stability of your resin coasters but also prevent them from scratching surfaces when used. Now, your coasters are ready to be showcased and used for your favourite beverages!
Conclusion
Now that you have learned the process of making resin coasters, it's time to explore your creativity and give it a try! This resin project is not only enjoyable but also practical, as you can create unique coasters that will impress your guests.
But resin crafting continues beyond coasters. There are endless possibilities with this versatile material. You can cast resin jewellery and design your statement pieces, or even get into the tabletop design by creating stunning resin tabletops for your home. If you're eager to explore more resin arts and crafts, Contact Us on Arts Shala, and gain access to exclusive tutorials, expert tips, and a supportive network that will help your creative journey.


