

Resin Pouring Techniques: Learn 5 Pour Techniques
Resin pouring is a technique that uses liquid resin to create decorative art pieces. Resin can be poured over a finished artwork, such as a painting, to seal it and give it a high-gloss finish. This shields the artwork against dust, moisture, and scratches. It can be blended with colourants and poured onto a flat surface, such as a canvas or mould, to create a unique and abstract art piece. This material hardens to form a solid, glassy layer that can be decorative on its own. You can use different pouring techniques, colour combinations, and inclusions (like flowers or shells) to achieve a wide variety of effects.
In this blog, we will explore five different resin-pouring techniques that will help you explore your creativity and achieve beautiful results. Whether you are a beginner or an experienced resin artist, these techniques will provide you with new ideas and inspiration for your next project. To further explore these topics, make sure to enrol yourself in a resin art workshop.
5 Amazing Resin Pouring Techniques
Resin pouring has taken the art world by storm. This technique lets you create stunning pieces, from decorative coasters to majestic wall art.
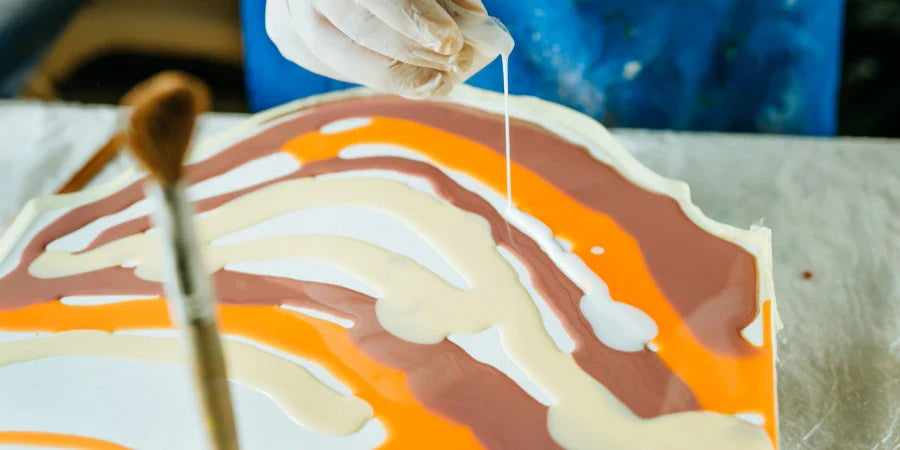
1. The Dirty Pour
It is a resin-pouring technique for those who crave a touch of unpredictability in their creations. It allows colours to flow and blend organically, resulting in stunning, one-of-a-kind pieces. Here's a breakdown of this exciting technique:
- Prepare Your Colours: Mix your resin with your chosen pigments in separate cups. Don't overmix! You want the colours to be slightly opaque to create interesting blends when poured together.
- The Big Pour: With your canvas or mould level, carefully pour each coloured resin onto the surface in a layered fashion. You can create a puddle pour (all colours poured in the centre and allowed to spread) or a swipe pour (colours poured in lines or sections).
- Let it Rest: Once all the colours are poured, resist the urge to over-mix! The beauty of the dirty pour lies in the organic blending. You can use a straw or palette knife to nudge the colours gently and encourage interesting cell formations.
- Tilt and Swirl (Optional): For a more dynamic effect, carefully tilt your canvas or mould to spread the colours further. You can even gently swirl the mould to create a mesmerising flow.
- Let it Cure: Leave your artwork undisturbed in a well-ventilated area to cure completely according to the resin's instructions.
2. Swipe Technique
It is a popular resin-pouring method for creating a marbled or swirled effect in your artwork. It's known for its relative ease and ability to produce stunning results. Here's a breakdown of the swipe technique:
- Prepare Your Base Layer: Pour a thin layer of coloured resin onto your mould or canvas. This will be the base for your swipes.
- Let it set partially: Wait for the resin to become slightly tacky but not completely cured. Refer to your specific resin's curing times for guidance.
- Introduce the swipe colour: Pour or drizzle another contrasting colour of resin on top of the partially cured base layer.
- The Swipe: Here comes the magic! Take your palette knife or squeegee and gently drag it across the surface of the resin, pulling the colours together and creating swirls and streaks. You can manipulate the angle and pressure of the swipe to achieve different effects.
- Refine and Cure: Use a heat gun (following safety precautions) to remove any air bubbles that may appear. Let the resin cure completely according to the manufacturer's instructions.
3. The Cell Technique
It is all about creating those beautiful organic "cells" within your artwork. Here's a breakdown of this technique:
- Base Coat: Begin by pouring your desired base colour of resin onto your mould or canvas. This layer sets the stage for the cells to emerge.
- Alcohol Ink: Add a few drops of alcohol ink onto the wet resin surface. The beauty of alcohol ink lies in its natural tendency to spread and bloom within the resin, creating those wispy, dreamlike cells.
- Heat Manipulation (with Caution): A heat gun can be your tool to guide the cell formation gently. Always follow the manufacturer's instructions for using a heat gun with resin. When using it, maintain a safe distance and keep it constantly moving to avoid overheating the resin. Apply heat gently just above the resin surface. As the resin warms, the alcohol ink will start to move and expand, forming the characteristic cell shapes and sizes.
[Pro Tip: You can use the heat gun to nudge the cells in specific directions, influencing their form and creating a more controlled composition.]
4. Alcohol Ink Painting
The alcohol ink painting technique with resin pouring is a beautiful way to create fluid, dreamlike artwork with added depth thanks to the resin. Here's a breakdown of the process:
- Prepare Your Resin: Mix your resin according to the manufacturer's instructions, ensuring proper ventilation and wearing safety gear.
- First Resin Layer: Apply a thin coat of transparent resin onto your mould or canvas. It will serve as the foundation for your alcohol ink creation.
- Alcohol Ink: While the resin is still wet (check the specific curing time for your resin), use your droppers or syringes to add drops of alcohol ink in various colours. The inks will spread and dance on the resin surface, creating organic patterns.
- Enhancing the Design (Optional): Use a heat gun (following safety guidelines) to gently manipulate the alcohol inks. The heat will help the colours move and blend further.
- Palette Knife or Straw: You can use a palette knife or straw to gently nudge the inks and create swirls or other desired patterns. Once you're satisfied with the look of your alcohol ink creation on the resin, carefully pour a clear topcoat of resin to encase your artwork. This will give it a glossy finish and preserve the design.
- Curing Time: Allow the resin to cure completely according to the manufacturer's instructions. This can take anywhere from a few hours to a day.
5. Resin Geodes: Unearthing Hidden Treasures
It captures the essence of glittering crystals trapped within smooth rock. Here's a detailed look at the resin pouring technique to create your miniature geode world:
- Prepare Your Workspace: Ensure good ventilation and wear your safety gear. Cover your workspace with newspaper or a disposable sheet.
- Mix the Base Resin: Following the manufacturer's instructions, mix your resin and hardener in appropriate proportions.
- Pour the Base Layer: Pour the coloured resin onto your mould or canvas. Tilt and gently swirl the mould to spread the resin evenly and coat the entire surface.
- Create the Crystal Layer: Carefully sprinkle your crushed crystals, glass pieces, or metallic flakes onto the wet resin. Use your creativity to arrange them in clusters or scattered formations, mimicking a natural geode.
- Second Look: Take a moment to ensure you're happy with the crystal placement. You can use a toothpick or palette knife to nudge any pieces that need adjusting gently.
- Topcoat: Once the base layer with crystals has been partially cured (check your resin's instructions for timing), carefully pour a clear coat of resin over your entire artwork. This encases the crystal layer and creates a smooth, glossy finish.
- Banish The Bubbles: Use a heat gun (while maintaining a safe distance) to gently pop any air bubbles that may have risen to the surface.
- Curing Time: Ensure that your resin geode is fully cured as per the manufacturer's guidelines, which may require 24 to 48 hours.


