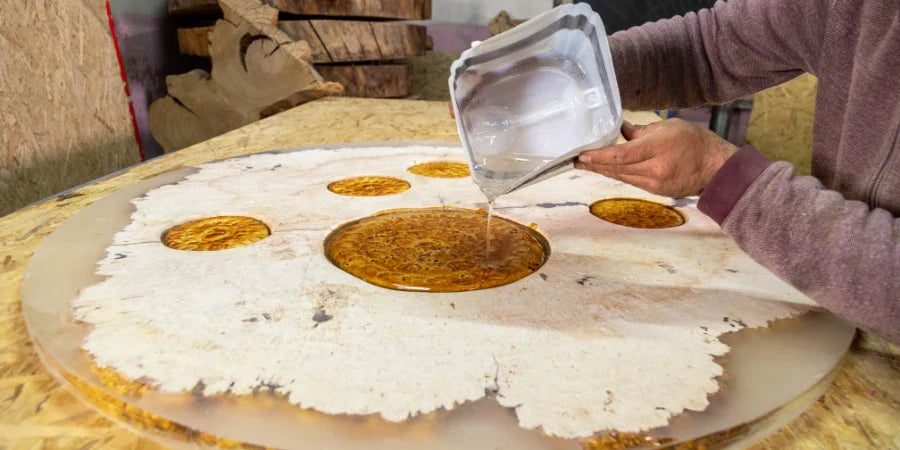
Understanding and Fixing Bare Spots in Cured Resin
Have you ever poured your heart (and resin) into a project, only to discover frustrating bare spots after curing? These imperfections can leave your creation unfinished and far from the smooth, glossy finish you envisioned. But fear not, resin artists! Understanding the cause of bare spots is the first step to preventing them and achieving flawless results.
This post dives deep into the world of bare spots, exploring the reasons behind their appearance and equipping you with the knowledge to banish them from your future projects. We'll uncover the sneaky culprits that disrupt the bonding process, from surface contaminants to material mismatches. By the end, you'll be a bare spot-fighting pro, ready to create stunning, uniform resin masterpieces. To know more, enrol in a resin art workshop.
The Usual Suspects: Contamination at the Crime Scene
The most common culprit behind bare spots is contamination on the surface when applying the resin. Think of resin like super glue – it needs a clean surface to form a strong bond. Here are some sneaky contaminants to watch out for:
The most frequent cause of bare spots is contamination on the surface you're applying the resin. Resin acts like a super strong glue, and just like any adhesive, it needs a clean surface to form a good bond. Here are the usual suspects when it comes to surface contaminants:
- Dust, Dirt, and Debris: These tiny invaders act as barriers, preventing the resin from properly contacting the underlying surface. Even seemingly insignificant amounts of dust can disrupt the bonding process.
- Mould Release Agents: If you're using a silicone mould for your project, ensure all traces of the mould release agent are gone. Residual release agents can leave behind a slippery film that repels the resin.
- Oils and Greases: These can come from your hands, work surface, or materials you plan to embed in the resin. Skin oils, machining oils on metal elements, or unwashed embellishments can all leave behind a greasy barrier. To combat this, thoroughly clean everything with isopropyl alcohol before pouring the resin.
Pouring Technique: When Resin Takes a Dive
Another reason you see bare spots is if you're pouring resin onto a porous surface like wood or unsealed concrete. These materials can absorb some of the resin, leaving behind uneven coverage.
Less Common Causes
While less frequent, other factors can contribute to bare spots:
- Improper Mixing: Not following the manufacturer's recommended mixing ratios for the resin and hardener can lead to curing issues. Incorrect ratios can affect the viscosity of the resin, making it harder to spread evenly and potentially leading to uncured patches.
- Uneven Pouring: If you don't pour the resin carefully and consistently, you might end up with thin spots that don't cure properly, resulting in bare areas.
How to Avoid Bare Spots: A Recipe for Success
Now that we've identified the main culprits, here's how to stop them from ruining your next resin project:
- Isopropyl Alcohol: This is your best friend! Wipe down your work surface, moulds, and any embellishments you'll be using with isopropyl alcohol and a lint-free cloth. Double-check for fingerprints, too!
- Warm Water and Soap (for certain surfaces): For some surfaces like ceramic or glass, a good cleaning with warm water and a grease-fighting dish soap like Dawn can be effective, followed by a final wipe-down with isopropyl alcohol.
- Resin-Compatible Sealant: If you're working with wood, concrete, or other porous materials, apply a thin layer of a sealant specifically designed for resin. This creates a non-absorbent barrier, ensuring the resin adheres evenly.
- Precise Ratios: Always follow the manufacturer's instructions for mixing ratios exactly. Improper ratios can affect how the resin cures and bonds, potentially leading to bare spots.
- Flat is the Way to Go: Use a level to ensure your project surface is perfectly horizontal before pouring the resin. This helps prevent pooling and the formation of bare spots in low areas.
- Minimise Air Movement: Air bubbles can become trapped in the resin, causing imperfections. Work in a well-ventilated area with minimal air movement, like drafts or fans. Consider using a tent-like structure to create a calmer environment for your pouring.
- Gloves are Your Guardians: Our skin naturally contains oils that can interfere with curing. Wear gloves throughout the application process to prevent fingerprints and potential contamination.
Bonus Tips
If you notice a small bare spot after pouring, you can sometimes rectify it before the resin cures completely. Here's how:
- Warm the Resin: Using a heat gun on a low setting (never use a direct flame!), carefully warm the uncured resin around the bare spot. This can encourage the surrounding resin to flow and fill the void.
- Thoroughly mix the resin and hardener: Make sure to mix the components of the resin thoroughly according to the manufacturer's instructions to ensure a uniform cure.
- Apply the resin evenly: Apply the resin evenly across the surface using a brush or spreader, making sure to cover to avoid any bare spots fully.
- Clean and prepare the surface: Before applying the resin, clean and prepare the surface thoroughly to remove any contaminants that could interfere with the curing process.
- Control temperature and humidity: Work in a controlled atmosphere with the ideal temperature and humidity levels to ensure uniform resin curing.
By following these detailed steps and adopting a meticulous cleaning routine, you can create stunning resin projects with a flawless, even finish. Remember, extra prep work goes a long way in achieving beautiful results!


