

What Can I Use as a Resin Mould?
Are you a craft enthusiast looking to try out resin moulding? Resin moulds are an essential part of the process, allowing you to create beautiful and unique pieces of art. However, you may be wondering what materials you can use as a resin mould. Let's begin by discussing traditional silicone moulds. These versatile tools are made from high-quality, food-grade silicone and are popular among hobbyists and artists who create candles, jewellery, and figurines.
If silicone moulds don't fit your needs or budget, there are alternative materials like plastic or glass containers. Overall, choosing the right resin mould depends on your project requirements and budget. In this blog, we will explore various options for resin moulds, their pros and cons, and guide you towards finding the perfect choice for your next resin project. To learn more about resin moulds and their applications, you can enrol yourself in a resin art course.
Traditional Silicone Moulds
These are versatile tools used in crafting and cooking, made from high-quality, food-grade silicone. These moulds are flexible, non-stick, and can withstand extreme temperatures, making them perfect for creating intricate shapes in baking, chocolate making, and resin art. Their durability ensures repeated use without losing shape.
To create silicone moulds, silicone is poured into a prepared shape, mould box, or die, forming the shape of the container or item placed within. They are popular among hobbyists and artists who create candles, jewellery, and figurines. Suitable silicone can be found in arts and crafts stores, hardware stores, or speciality stores online, with platinum-catalysed and tin-catalysed silicone being the two types commonly used.
There are four types of silicone moulds: glove, block multiple piece, block, and cast glove. Each type requires a room-temperature working space, protective gloves, plastic sheets, mixing containers, stirring sticks, and a mould box. The appropriate mould should be selected based on your desired result.
Pros of Silicone Moulds:
- Flexibility: Unlike rigid metal or glass pans, silicone moulds can be easily bent, twisted, or folded to remove your baked goods. This flexibility ensures smooth and intact release, minimising the risk of any damage to your creations. Additionally, silicone moulds are space-saving due to their pliable nature. They can be stacked or rolled up, taking up minimal storage space.
- Durability: Unlike other mould materials that may degrade over time, silicone moulds retain their quality and stability even after multiple uses. They can withstand the repeated application of resin without losing their shape or structural integrity. The reusability of silicone moulds not only saves money in the long run but also reduces environmental waste, making them an eco-friendly option for artists.
- Wide Variety: Artists can find silicone moulds in a wide range of options, including geometric shapes, flowers, animals, abstract forms, and more. This versatility opens up endless possibilities for resin artists, enabling them to explore their creativity and create unique and personalised resin art pieces.
Cons of Silicone Moulds:
- Price: Silicone moulds are typically more expensive compared to alternative mould materials such as plastic or rubber. The high cost can be a deterrent for artists who are starting out or have a limited budget. However, it's essential to weigh the benefits and longevity of silicone moulds against their initial investment.
- Limited Heat Resistance: While they can withstand moderate temperatures, they may not hold up well under extreme heat. If you are working with resin that requires high heat curing or if you live in a hot climate, silicone moulds may not be the ideal choice. The moulds can warp or lose their shape when exposed to excessive heat, leading to imperfect resin casts.
- Difficult Release of Air Bubbles: Resin art often involves the use of epoxy resin, which can produce air bubbles during the curing process. It can be challenging to release these air bubbles from silicone moulds, as the flexible material can trap them inside. This can result in unwanted air pockets and imperfections in your resin art. Artists may need to employ additional techniques, such as a pressure pot or vacuum chamber, to ensure a bubble-free finish when using silicone moulds.
Alternative Mould Materials
If silicone moulds don't quite fit your needs or budget, fear not. Several alternative materials can be used as resin moulds. Let's explore some of these options:
Plastic Containers
Plastic containers serve as a budget-friendly alternative to silicone moulds for resin art. These containers can be easily found in various shapes and sizes, allowing artists to experiment with different designs and forms. Additionally, plastic containers are lightweight and flexible, making them convenient for demolding the resin once it has cured. One of the major advantages of using plastic containers is their reusability. Unlike silicone moulds, which may tear or lose their shape over time, plastic containers can withstand multiple uses without compromising the quality of the mould. This makes plastic containers ideal for artists who frequently create resin art pieces.
Pro Tips: Opt for containers made from food-grade, BPA-free plastic to ensure the safety of your artwork.
Glass Containers
Glass provides a unique aesthetic appeal and allows artists to create transparent or translucent resin art pieces. It also offers a smooth surface for demolding the resin, resulting in a polished and professional finish. Glass jars, bowls, or vases can be easily repurposed as moulds for resin art. However, keep in mind that the shape and size of the container will determine the final form of your artwork.
Glass containers with intricate designs or unusual shapes can produce visually captivating resin art pieces. Despite their elegance, glass containers have certain drawbacks that artists should consider. Unlike silicone moulds or plastic containers, glass is not as flexible, which can make demolding slightly challenging. It is crucial to take precautions while removing the cured resin to avoid any accidental damage to the glass mould or the artwork itself.
Pro Tips:
- It is recommended to wash the containers with warm, soapy water and dry them thoroughly before starting your project.
- To prevent your resin from sticking to the glass container, it is crucial to apply a release agent. There are various options available, such as mould-release sprays, silicone oil, or even a simple coat of petroleum jelly.
Steps of DIY Mould Making for Resin Art
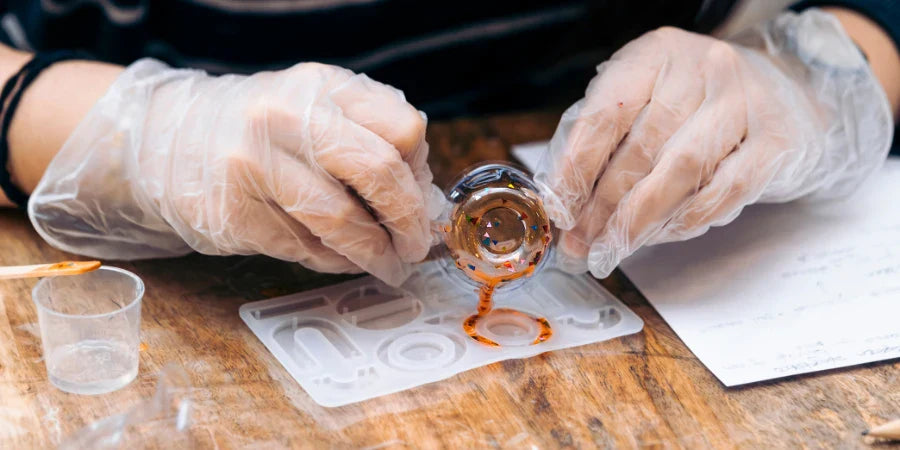
Mould-making involves creating a replica of an object by making an impression. This impression is then filled with casting material, resulting in a precise reproduction of the original object. You can also use our Uppercase Letter Y Silicone Mould to create personalised resin pieces with precision and ease. Follow these steps to get the desired results.
- Prepare Your Workspace: Start by ensuring that your workspace is clean and well-ventilated. This is important for a successful mould-making process.
- Gather Necessary Materials and Tools: Collect all the materials and tools you'll need, including the object you wish to replicate, moulding material (such as silicone, latex, or alginate), and a release agent.
- Select Your Moulding Material: Depending on your project and desired outcome, choose a suitable moulding material. Silicone, latex, and alginate are popular choices, each with its own specific properties.
- Prepare the Object: Clean and prepare the object you wish to mould. If the surface is porous, apply a sealant to prevent the moulding material from seeping into the object.
- Apply the Release Agent: It's crucial to apply a release agent to both the object and the container in which you will pour your moulding material. This ensures easy demolding later on.
- Mix and Pour the Moulding Material: Follow the instructions provided with your chosen moulding material to mix it properly. Slowly and evenly pour the material over your object, making sure to capture all the intricate details.
- Allow the Mould to Cure: The curing time will vary depending on the type of moulding material used. Refer to the manufacturer's instructions for the appropriate curing time and let the mould cure undisturbed.
- Demold and Clean the Mould: Once the mould has fully cured, carefully remove it from the object. Take your time and be gentle. Once de-moulded, clean the mould thoroughly, making sure there are no residual materials or debris.
Conclusion
Silicone moulds offer versatility, durability, and a wide variety of choices. However, they may come with a higher price tag. If they don't fit your needs or budget, alternative materials like plastic containers and glass containers can be used as resin moulds. Plastic containers are budget-friendly, and glass containers provide a unique aesthetic appeal. DIY mould-making is also an option. Regardless of the material you choose, Arts Shala offers a resin art course to help you learn more about resin moulds and their applications. Contact Us today to enrol in our course and unleash your creativity with resin moulding.


