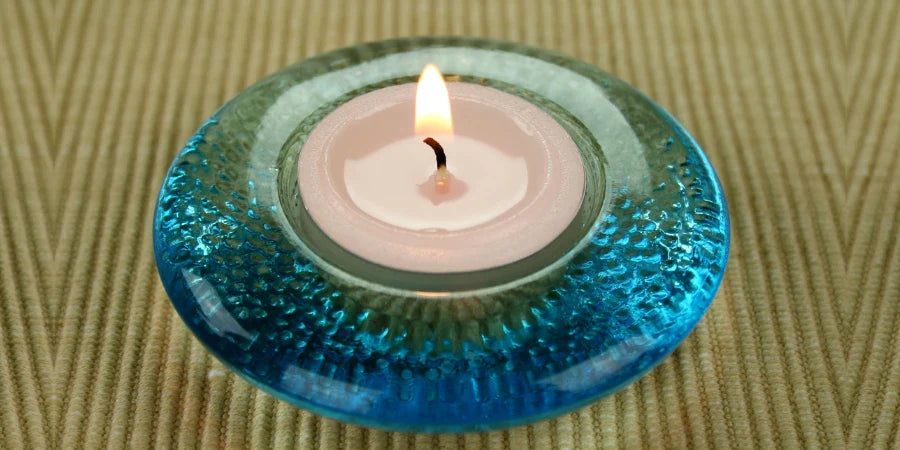
How to Make Epoxy Resin Candle Holders?
Candle holders are a great way to add ambience and style to your home. They come in various materials, styles, and sizes, so you can find one that perfectly fits your taste and décor. Epoxy resin is an excellent choice for making them due to its several advantages like versatility, customisation, durability, etc.
The final result is a beautiful way to add a touch of elegance to your home. They can be made in various shapes and sizes and customised with colours, pigments, and decorative elements. This blog will guide you through creating your epoxy resin candle holders from start to finish. To learn this technique professionally, enrol yourself in a resin art workshop.
Steps to Make Epoxy Resin Candle Holders
Before starting the process, wear gloves and safety glasses when handling epoxy resin, as it can irritate skin and eyes. Ensure you're working in a well-ventilated area. Here's a breakdown of the steps to make epoxy resin candle holders:
Instructions
- Prepare Your Workspace: Cover your work surface with a tarp or protective sheet.
- Clean the Mould: Wipe down the inside of the mould with rubbing alcohol or a cleaning wipe to remove any dust or debris. It will ensure a clear and smooth finish on your candle holder.
- Prepare the Resin: Following the instructions on your specific resin kit, measure out equal parts of Part A and Part B resin into separate mixing cups.
- Mix the resin: Pour one part into the other cup and stir slowly and thoroughly for several minutes. Scraping the interior of the cup using your stir stick is crucial to guarantee thorough mixing of the resin. Mixing for the proper time is essential to avoid a sticky, uncured finish.
Adding Color and Embellishments (Optional)
- If you want coloured candle holders, add a few drops of resin dye to one of the mixing cups before combining Parts A and B.
- Once you've mixed the resin before pouring it into the mould, you can add glitter, dried flowers, or other small embellishments. Use a toothpick or craft stick to arrange them carefully in the mould.
- Pour the resin: Pour the mixed material into the mould with caution and at a gentle pace. Begin by pouring a thin layer to cover any decorations before filling up the remaining space in the mould.
- Remove air bubbles: Use a heat gun on a low setting to gently remove any air bubbles that rise to the surface of the resin. Hold the heat gun a few inches away and keep it moving to avoid overheating the resin.
- Let it cure: Allow the mould to remain untouched on a flat surface for the curing duration advised in your resin kit, which may range from 12 to 24 hours or longer.
- Demolding: Carefully peel the mould away from the hardened resin candle holder once the resin is fully cured.
- Sanding (Optional): If there are any rough edges on your candle holder, you can lightly sand them with fine-grit sandpaper.
- Insert the candle: Place your glass or metal candle insert inside the cured resin candle holder.
Tips
- Work in a warm room (around 70°F) for optimal curing.
- If you plan on making multiple colours or designs, it's helpful to mix and pour each colour in batches to avoid the resin curing before you're finished.
- Clean your mixing cups and stir sticks with rubbing alcohol right after use. Cured resin can be difficult to remove.
Types of Epoxy Resin Candle Holders
Thanks to the material's versatility, epoxy resin candle holders come in a wide variety. Here are some popular types:
Geode-Inspired Candle Holders
- Materials: Blue, white, and black epoxy resin dyes, crushed glass or crystals, rubbing alcohol in a spray bottle.
- Add a clear resin layer to the mould, then swirl white and blue dye into the wet resin with a toothpick to form a cloud-like base.
- Once partially cured (refer to resin instructions for the tacky stage), use a spray bottle with rubbing alcohol to manipulate the colours and create wispy patterns gently. This mimics the natural formations in geodes.
- Sprinkle crushed glass or crystals onto the tacky resin for a sparkly geode effect.
- Pour clear resin over the top to encase everything.
Marbled Candle Holders
- Materials: Multiple colours of epoxy resin dye and rubbing alcohol in a spray bottle (optional).
- Mix separate batches of resin with different coloured dyes.
- Fill the mould with a small quantity of each colour, letting them blend slightly without complete mixing.
- Use a toothpick to swirl the colours together to create a marbled pattern gently. You can also use a straw to blow on the resin for a more wispy effect.
- To create even more dramatic marbling, lightly mist the surface with rubbing alcohol after pouring. The alcohol disrupts the surface tension and creates a more cellular marbling pattern.
- Carefully pour clear resin over the top to encase everything.
Embedded Object Candle Holders
- Materials: Small seashells, dried flowers, coffee beans, or other small objects, such as tweezers.
- Pour a thin layer of transparent resin into the mould.
- While the resin is still wet, use tweezers to arrange your chosen objects in the mould carefully.
- Once positioned, pour clear resin over the top to encase everything.
Additional Ideas
- Layered Candle Holders: Achieve a multi-dimensional look by pouring various coloured resins sequentially, ensuring each layer partially sets before introducing the subsequent one.
- Metallic Candle Holders: Mix a small amount of metallic powder into the resin for a shimmery, metallic finish.
- Wood and Resin Candle Holders: Combine wood elements with epoxy resin for a rustic-chic look. You can cast resin around timber or create a wood and resin composite for the mould.


